Monday, April 4, 2011
All Bundled Up
Hoppy for you!
Two weeks ago I had 6 of my students perform in the music festival in our town. It is a great opportunity to learn and grow in their performance skills. I am happy to say that they all did very well! One student was also chosen to win an adjudicator's award at the showcase last week. Way to go, students!

I made these treat boxes to let them know I am so proud of them. I recently bought this die (a mini milk carton) from Stampin' Up and I have used it so much already! Just change the colors and stamped sentiment and you've got the perfect little token of appreciation, good luck, love, happy birthday, congratulations, thank you, or happy holiday (insert Christmas, Easter, Valentine's, Halloween, St. Patrick's Day). LOVE it!
Friday, March 25, 2011
Otto's First Year Mini
- I started with pre-purchased envelopes which were something like 5" x 11". I cut the long side down to 7" to accommodate my 5x7 photos. I punched a slit through one side only to make the tabs (which would be used on the inserts) visible.
- In Photoshop, I added the month and the number of months old Otto was in each picture, and lowered the opacity.
- I printed Otto's accomplishments for each month on white cardstock and left room to add extra pictures. On the back of the cardstock, I wrote which number month it was.
On the right sides of the pages, I adhered my 5x7 photos. On the left side, I used up to three 2x3 photos, a Making Memories premade journaling spot with the numbered month in white, a strip of border punched paper, and a simple embellishment. I stiched around each left-side page before adhering it in the album.
- I used 7 different patterned papers throughout, using each only once or twice, and using extra for the strips of border punched paper. I used strips of these papers for the front and back cover as well.
- I bound it using my Cinch (which I am in love with, btw!) and added some ribbon.
Remember, you can click on any one image to see it larger.
Friday, March 4, 2011
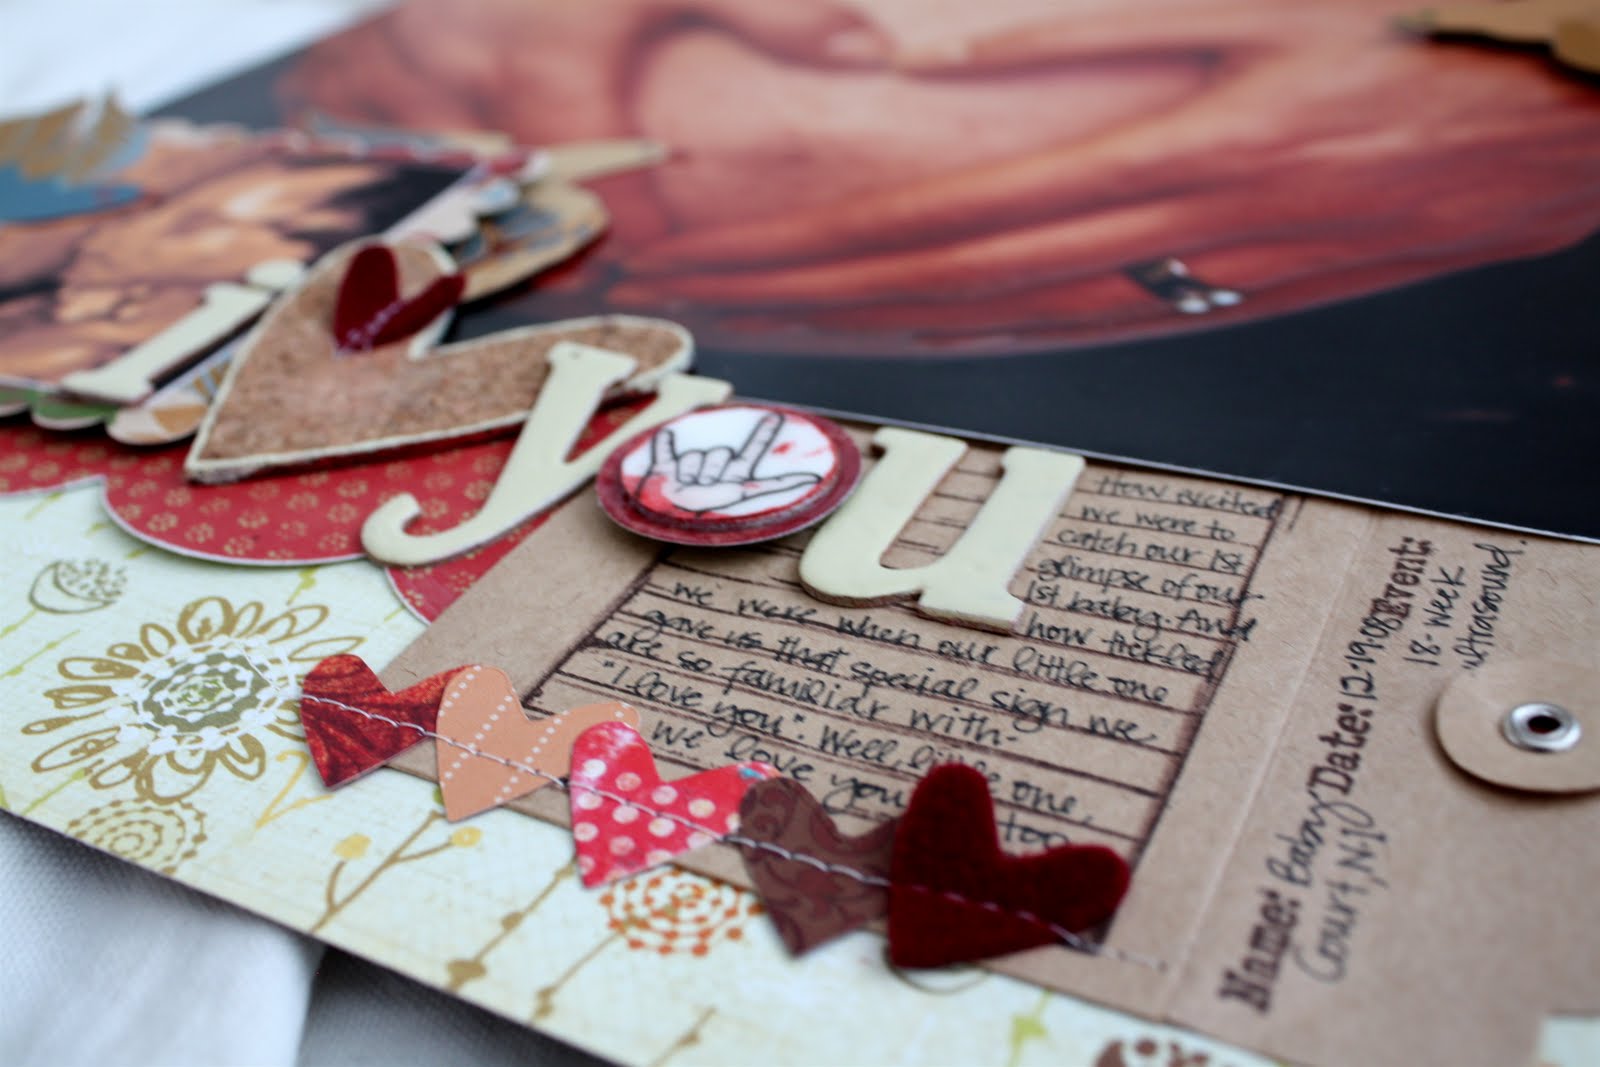
I Love You LO
I finally put this one together. It's been in my mind's eye for quite some time, but I wanted it to be perfect, and now's the time. Journaling reads: "How excited we were to catch our first glimpse of our 1st baby. And how tickled we were when our little one gave us that special sign we are so familiar with - "I love you". Well, little one, we love you too."
And an update with my one little word: I've been taking Ali's class and I've really enjoyed the prompts and the way she has encouraged us to keep our word in mind. I've really been trying to "focus" on focusing on the important things. One thing I've really found that has improved is my goal of not procrastinating the thoughts and ideas in my head. If I know that I should do it, I have been doing it. This goes for crafty things, like the baby quilt I've been working on, and beginning to cut the master bed quilt I have in mind, scrapbook layouts and mini albums, for physical things I have been putting off for too long: EXERCISE!, and just plain old upkeep: doing the dishes right away. I even followed my thought pattern last week and made cookies (I haven't made cookies since Christmas time!) I am feeling good about my goals and my one little word!
Tuesday, February 22, 2011
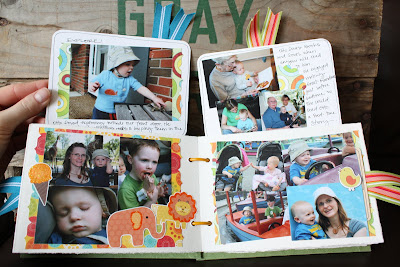
Summer Mini
I recently went on a crop and got most of this summer mini done. Then, I was very sick (and quite out of it) for a week, and on some heavy pain killers. I'm feeling better now, and I'm slowly regaining more energy daily. So, I was finally able to finish this and now able to show you!
This started out as an altered book. My good friend Birdie, who is a wonderful print artist, made this beautiful book and gave it to us at Otto's baby shower. And since then, I've been wondering what wonderful things I could put in it! I wanted it to be for family pictures or solely for Otto pictures.
The problem was that it was a very long accordion book and I knew that the moment I showed it to Otto and let him touch and look at it, it would get ripped quite easily (as evidenced by the stack of books I recently had to glue or tape). So I stewed over this for some time.
I finally came up with a solution I got so excited about! I asked Andy to drill two holes in the side so that I could attach some “o” rings. This way, I could make the accordion pages into pockets into which I could include more pictures and stories (it was, after all, a packed summer!).
Journaling reads: "I'm celebrating summer. Spending my days with a fun little man. Celebrating what makes him happy this first summer of discovery."
I added pictures and embellishments and included many spaces for pockets – behind pictures to allow for longer journaling for our stories (I used Ali Edwards journal overlays), and in the page pockets for extra pictures. I added ribbons and round metal tags for the pulls.
This has been one of my favorite mini books to work on. Thanks Birdie for the beautiful album!
p.s. I made a great mini album for Otto’s first year, which I’ve neglected to post here, so perhaps I will show you that next week! Also in the works: a new baby quilt! So exciting!
Wednesday, February 16, 2011
Monday, February 14, 2011
Valentine Minis
I've recently had a burst of creative energy. And just in time for Valentine's Day! I've had a Summer Mini Album in my mind for some time now (more on that soon), and these 2 Valentine minis were taken from this tutorial. I LOVE Ali Edwards! Her designs are wonderful and simple, and I actually use many of her journaling spots and overlays in my projects. By the way, Designer Digitals is having a fantastic sale on right now until midnight Tuesday. Check it out.
So, I made these 2 mini albums out of felt and paper. I have wanted to do a little felt book for ages, and now was just the perfect time! The first one I made for my parents and the second one I made for my sweetheart, Andy. It was very simple with Ali's free download and her fantastic instructions.


I also used this die to make valentines to hand out to some family and friends and it was a big hit! I borrowed the die from a friend, but will have to get my own because I know I will make good use of it. I can see thank yous and birthdays and favors and special holidays celebrated with this box and a handful of candies. It is SO adorable! I wish I took a picture of one of the ones I made, but they were gone fast! I will post another picture another time.
I hope your Valentine's Day was a lovely one!
So, I made these 2 mini albums out of felt and paper. I have wanted to do a little felt book for ages, and now was just the perfect time! The first one I made for my parents and the second one I made for my sweetheart, Andy. It was very simple with Ali's free download and her fantastic instructions.
I also used this die to make valentines to hand out to some family and friends and it was a big hit! I borrowed the die from a friend, but will have to get my own because I know I will make good use of it. I can see thank yous and birthdays and favors and special holidays celebrated with this box and a handful of candies. It is SO adorable! I wish I took a picture of one of the ones I made, but they were gone fast! I will post another picture another time.
I hope your Valentine's Day was a lovely one!
Subscribe to:
Posts (Atom)